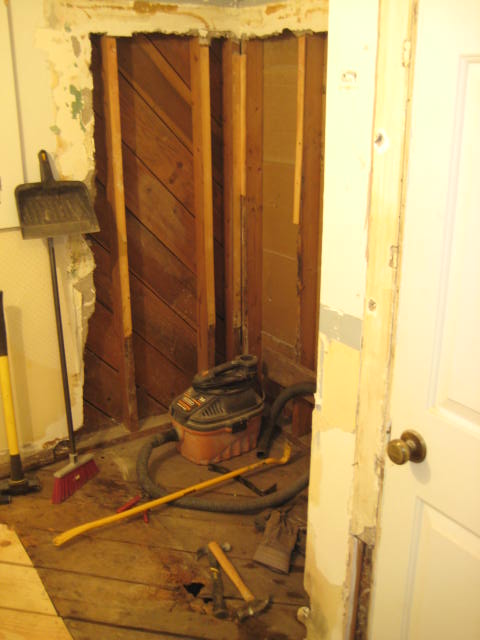
Today I started tearing out the bathroom. We knew that there would be some “issues”
judging from the electric tape around the pipes, massive caulk beads around the
baseboards and a general “bouncy” feeling as we walked across the floor. As I started the demo I quickly realized the
extent of the water damage- here are some pictures as I worked through the tear
out;


Tomorrow’s agenda will be to finish the subfloor and install the ¼” Hardi board which will be the surface for the eventual tile. After this is completed I hope to pick up the tub and hardware so we can at least have a functioning shower by the end of the night!
Also, as a sidenote, there was a chair rail installed at
some point in the bathroom. As I was
ripping it out today I noticed that it must have been put up by a real carpenter-
all of the joints were coped which means that the installer traced the profile
of the adjoining piece and cut it to match by hand. For those not familiar with trim work, this
type of installation is an art! Even
with laser guides, fancy jigs and expensive tools, I still cannot properly cope
a piece of trim without wasting a hundred feet of lumber. This discovery made me think of my late grandfather
who was a trim carpenter by trade- he could do these types of cuts in his
sleep! Here is what I am talking about- notice the piece on the left;

PS, before I forget, I got a couple emails asking what the finished bedroom floor looked like before we moved in furniture so here is a picture;
+2.jpg)
Is the floor just sealed with a polyurethane?
ReplyDeleteThe floor turned out beautiful!! Love the finsh. All that work and then it's covered up with furniture!! Hopefully you put some shades on that front window If you see the people across the street sitting in lawn chairs in their front yard you'll know you need curtains too!! The bathroom is coming along. You got a lot of work done yesterday. Did you pick the tile out yet? Also LOVE cc's corner!!
ReplyDeleteIt all looks great and of course, if Bella is happy, everyone is happy......and I am happy for her.
ReplyDeleteWe really like the floors, hope you find bathroom stuff at that neat place we found.....and here's to the first shower in the new bathroom, or should we say the first flush.....EC