Tuesday, July 10, 2012

BUILDING CUSTOM CABINETS AND RIPPING DOWN PLASTER WALLS


I continued work on the guest room built in dresser today by trimming out the edges of the cabinets- I will be adding the final drawer fronts and doors tomorrow.  Here are a few pictures as the project progressed;


 I also sanded down the floor in the new guest room walk in closet and put down a coat of stain near the end of the day- I like this shot because it shows a finished floor right next to its previous condition;

As I mentioned in the previous posts, we are moving on to the kitchen and I would like to have everything exposed by this weekend.  I started peeling off the plaster today- here is a before & after;


I found a couple of cool things as I tore into the kitchen.  The first was a label under the ¼” plywood underlayment as a pulled up the floor.  Our house was built in 1952 and I noticed a sticker from Sears & Roebuck that was dated December 1952 on the back of one of the sheets!  Here is a picture although the quality is not the best;


Also, since the laundry room was added on to the house at some point, I uncovered the buried exterior porch light behind the kitchen wall.  Here is a photo as I found it- you’ll notice that there was a switch and the line was cut in half as it went outside then covered over with plaster board;


I finished the day by making a run to the landfill and then installed some towel bars, etc. in the bathroom.  The goal for tomorrow, outside of finishing the guest room dresser, will be to finish the demo of the kitchen.  One area that may prolong the demo work will be moving the temporary sink to its final destination in the laundry room closet.  While the majority of the plumbing was already completed when I worked on the bathroom, I still need to make a connection and a vent for the new drain. 

Sunday, July 8, 2012

WRAPPING UP THE WEEK

Sunday was somewhat of an off day for Project NashVegas.  My dad left town around noon after spending the week helping me complete the bathroom.  We spent the morning doing some finish work including installing the doors and applying a coat of poly to the bathroom built in;


After my dad left I spent the afternoon running around returning supplies, getting a haircut, checking email, etc..  At the end of the day I started work on the guest bedroom built in dresser and completed the carcass before calling it a night.  If you remember from the first blog posts, at some point in time the owners added a stairway to the second floor which cut down the original guest room closet in half.  Here are some before pictures;


Even though I built a new walk-in closet in the room weeks ago, I didn’t want to waste the space so I decided to add some drawers in place of the old half closet.  As I said, I just started tonight so here is a picture of the frame- note that you will never see any of this after the 4 drawers are installed and I fill in the top;

I plan to start the week with a some last bathroom touchups while my girlfriend is at work. After these are completed I intend to start gutting the kitchen in preparation for my dad’s next visit this weekend- he is an electrical wizard so I’d like to have everything exposed so he can help me run all of the new plugs, switches, lights, etc. before we close up the walls.  I will continue to work on the small outstanding items in the other rooms during downtime and we are planning to refinish the rest of the floors the weekend of 27 July (my girlfriend will be out of town for 5 days).  Hopefully we will be done with the interior by the end of the month!

Friday, July 6, 2012


ALMOST OUT OF THE BATHROOM: 92.5% COMPLETED

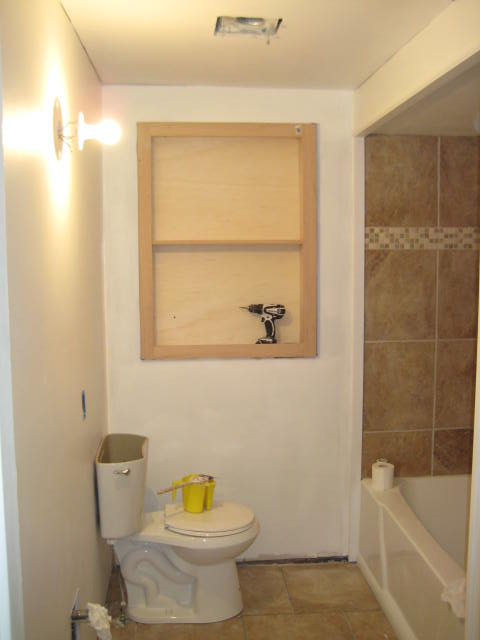
I waited a day to post because I wanted to show some cool “after” pictures of the bathroom.  We spent today getting around to the finish work- we started the day by priming, continued on to moulding, spent the afternoon caulking and finish painting and ended the day by installing the sink & accessories.  Here are some shots as the day progressed;


There are a few items that will need to be wrapped up tomorrow, the most visible being the built in medicine cabinet on the far wall.  As you may have seen in previous posts, there was a built in already installed however it was in poor condition after being repainted and readjusted over the years.  We took out the cabinet and decided to build a new one that utilized the space in a more functional, decorative manner.  We built the carcass out of oak using the same shelf pin idea as the bathroom linen closet discussed in the previous post.  We built paneled doors and, instead of using oak, we are dropping in frosted glass to give it a different look.  Here are some shots of the cabinet and the doors without the glass- the wood will be eventually stained cherry to match the vanity;


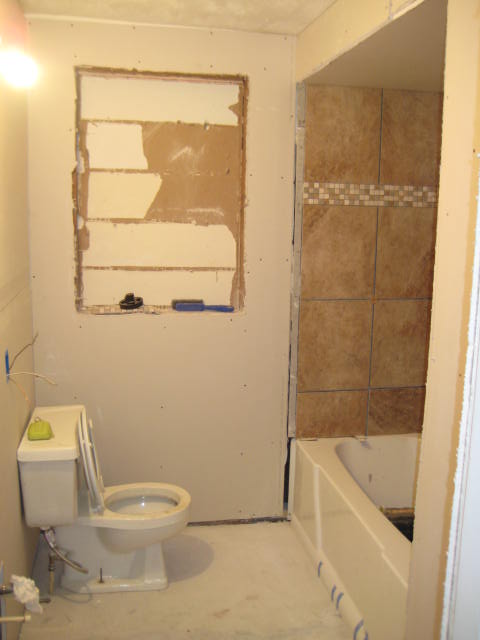
Here are some before and after's of the bathroom so far for reference;


Tomorrow we will be doing some caulking/painting touchups, installing a few more accessories (TP holder, mirror, etc.) and grouting the floor at the very end of the day so it can setup overnight.  While the bathroom is completely functional right now, we should be totally out of the room by noon tomorrow.  If we finish with the bathroom at a reasonable time, we plan to start on the kitchen by cutting out half of the dining room wall to create a giant 6’ doorway!   

Wednesday, July 4, 2012

BATHROOM UPDATE: 75% COMPLETED!

We grouted the tub surround this morning and moved on to tackle some odds & ends in the afternoon.  We finally seamed in the wood flooring to cover the other voids in the dining room- here is a before and some after’s;


We also added a built-in linen closet in the bathroom.  When we bought the house there was a closet in the bathroom however 50% of the space was taken up by HVAC ducts coming up from the basement.  While I unfortunately do not have any “before” pictures of this space, the owner had nailed together some 2x4’s to make a single shelf in the area.  We decided to utilize as much of the space as possible- we built a deep area for towels, etc. and filled in the tighter area with space for shampoo bottles, etc..  When looking at the photos please note that we used a shelf pin jig which creates holes in both sides of the cabinet to allow for pins to be installed and the shelves to be rearranged at any time.  We stained it the same color as the floor although the door will be white like the rest of the trim;

We finished the day by putting the floor down in the bathroom.  While I wanted to drop in mosaic keys to match the shower border, I was overruled by CC and my dad so we laid it out in a staggered pattern;

Here is a shot of the grouted tub surround BEFORE caulking & cleaning- the toilet is in the tub because we were laying the floor;

We purchased the easy “cool” stuff for the bathroom at the end of the day- vanity, mirror, lights, towel bars, etc...  Our goal for tomorrow will be to finish the walls/ceiling, install the vanity and grout the floor.  Hopefully the bathroom will be completely done by noon on Friday!

Monday, July 2, 2012

STARTING THE TILE

Today we finally made some visual progress in the bathroom!  We started the day by finishing off the new drywall on the walls and the new soffit over the tub.  Around 2:00pm we marked our grid for the wall tile, set up the wet saw and started tiling.  Here is a setup picture- the plywood strip was temporarily tacked in to support the first course of tile and to keep the correct spacing for the mosaic band;


Here are some installed shots BEFORE grout and trim;


I have to give credit to my dad for the amazing cuts- while he has decades of experience as a general carpenter, he has become a tile saw ninja over the last 5 years!  Tomorrow’s goals will be to grout the tub surround, mud the new drywall and put down the floor.
BUILDING A NEW BATHROOM

Sorry for the delay in posts but I have spent the last few days doing grunt work to get the bathroom ready for tile and finishing.

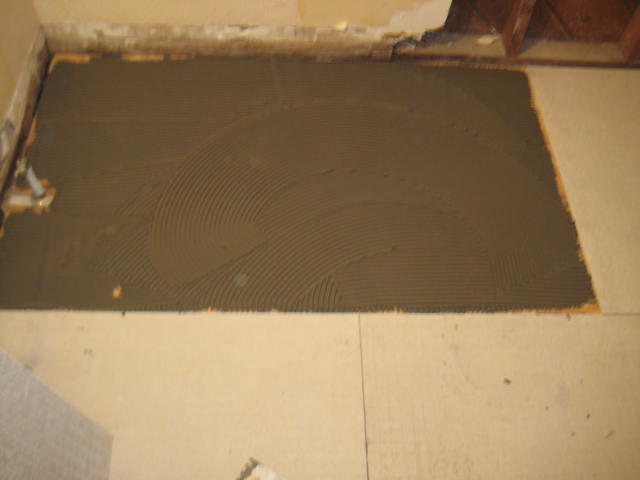
I spent Wednesday replacing rotted 1x8 floor planks, leveling the bathroom with a new ¾” ply subfloor and putting down ¼” Hardi backerboard for tile.  Here are some pictures;


Since half of the bathroom floor was rotted and the previous owner had rigged some “improvements” over the years, I needed to replace the toilet flange and drain- I am still amazed that the toilet didn’t fall through the floor over the last 3 weeks.  I actually enjoyed this task because it corrected decades of neglect in about 2 hours and resulted in a perfectly clean finish- here are some pictures;


I spent Thursday in the basement running new plumbing to the whole house.  All of the original plumbing was galvanized steel and there had been numerous patch jobs over the years that were causing leaks and miles of unnecessary supply lines.  I shut off the water at the street and switched over everything to CPVC which included relocating the laundry room with the addition of a stationary tub, installing shut off valves at every fixture (there were no shut offs when we bought the house) and the addition of a couple spigots to the outside for garden hoses.  While I have done some plumbing work in the past, I have never done an entire house changeover so this definitely tested my abilities.  I was also very happy that there were no leaks after turning on the water for the first time (knock on wood)!  As a sidenote, I realize that some real plumbers and old school contractors may look down on using CPVC however I love the stuff.  CPVC is 80% cheaper than copper, flexible enough to work in tight spaces, forgiving enough to allow for less than perfect measurements/angles, installs exponentially easier than sweating copper for the amateur plumber and, from the novice level of research I’ve done, performs better than copper especially in terms of freezing.   I don’t have many pictures of this work because it is pretty dark down there but I will post some whenever I get around to installing some lighting in the basement.
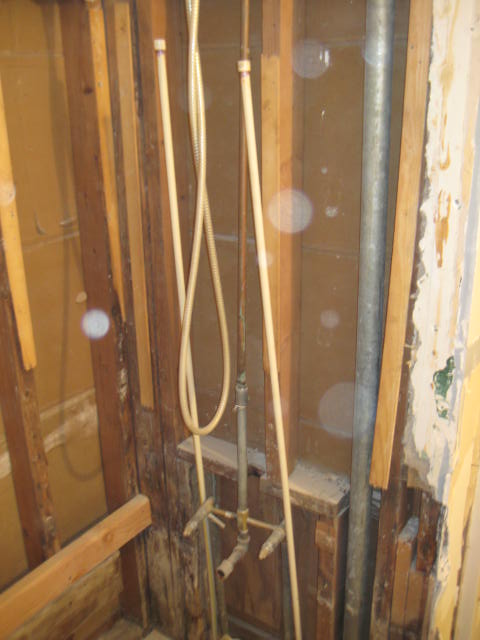
Here are the new rough supply lines coming up from the basement next to the old plumbing;

Here is the new connection with the old stuff removed;


Here are the rough supply lines coming up from the basement to the backside of the laundry room;


Here are the new plumbing connections on the backside of the new laundry room;


Here is a shot of the same plumbing inside the laundry room- notice the spigots for the washing washine at chest level and the lines for the eventual sink near the floor in the middle;


Friday was a slow day and I didn’t get much accomplished.  I spent the morning reorganizing and cleaning up in preparation for my dad’s visit on Saturday.  Since the temperature has been around 105 for the last week and will continue for another, I put in a couple window units to help keep at least the bedroom and living room cool.  The house has central air and it is in good shape however it was having trouble keeping the temperature below 80 especially with the back half of the house only covered in a layer of Tyvek.  I managed to prep the shower area for backboard and tub installation but spent the majority of the day doing laundry, picking up supplies, etc...
As I mentioned, my dad came into town on Saturday and will be helping me out for the next week.  His visit comes at a perfect time because we have moved into the house and the camper is still sitting unused in the driveway.  He made it into town around noon and we spent the rest of the afternoon installing the tub and the shower faucets.  Although it took longer than expected, we had everything up and running by 9:00pm.  Now that the tub was in and everything was connected, I wanted to take a shower in an actual shower however the tub surround was still just studs.  In a moment of brilliance/stupidity, I remembered the leftover Tyvek House Wrap that we had from the laundry demo 3 weeks ago.  In theory it seemed to make sense so I wrapped the shower walls in Tyvek and finished the night with a shower in a real bathroom!  Here are some pictures;


Our goal at the start of Sunday was to install the backerboard in the morning and have tile on the walls by the end of the day.  Again our work took longer than expected and we won’t be getting to the tile until Monday.  While we didn’t get our daily goals accomplished, we progressed on several other areas that needed attention including installing new drywall on the bathroom walls, running electric to the laundry room for the eventual washing machine/utility outlets and framing a drop ceiling above the shower to give the illusion of separation from the main part of the bathroom.  We also spent some valuable time picking out the main tile & accent tile and decided on the eventual layout/design of the floor & walls.  Here are some pictures at the end of the day- I realize that this doesn’t look like a lot of progress but tomorrows update should include pictures of tiled walls & floor;